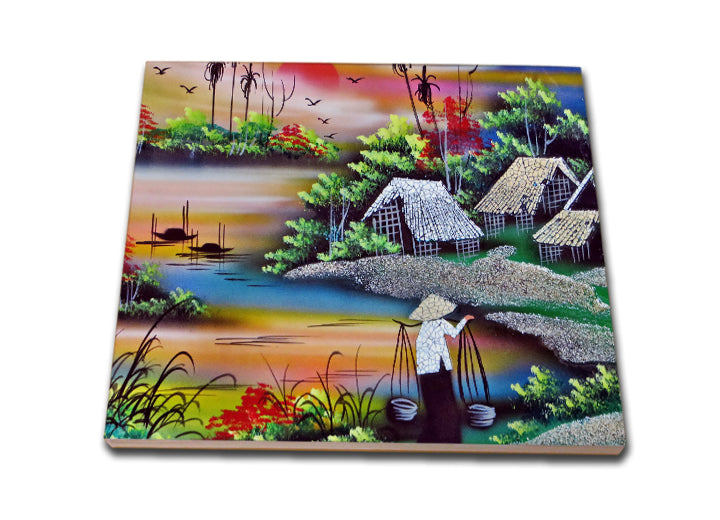
Ceramic Tiles
Transferring Instructions¬
Supplies Needed
• Sublimatable Ceramic Tiles
• Sublimation Transfer
• Heat Resistant Felt Pads
• Heat Resistant Gloves
• 1” square pieces of thermal rubber mat (optional)
• Cover sheet- teflon or thin paper
p 1: Adjust Heat Press
Heat Press Temperature: 400o F
Dwell Time: Varies (see attached Chart)
Pressure: Medium
Note: Ask us for free 1” squares of thermal rubber. We will send it with your order. 😊
These instructions, including transfer times and temperatures, are based on the inks, paper, presses, and products we use. Your inks, papers, etc. may require adjustments in your time/temp settings.
Step 2: Design & Print Your Transfer
Design your transfer based on the tile size. If you are designing a full-bleed image, we recommend designing the transfer so that it is at least 1/8” larger than each tile, all the way around.
Step 3: Transfer the Image
1. Place the Heat Resistant Felt Pads on heat press platen. For best results, we recommend at least two layers of Heat Resistant Felt Pad (use two pads or fold one felt pad over).
2. Place transfer on felt pads, face-up.
3. Place tile face-down on the transfer. You will be heating through the back of the tile
4. For 4-1/4” and 6” tile size, place a 1” square of thermal rubber in the center square of the tile to bring heat to this area.
5. Close the heat press. Refer to the attached Chart for time and pressure. The pressure is very important. Too little pressure will result in unprinted tile edges.
6. Tips & Troubleshooting
• Measure your tile before you design your transfer. Tile sizes are standard to the construction industry, not the printing industry. They vary by manufacturer, and listed sizes are only approximate. For example, there are three different variations of 6”x8” tile available, and each one is a slightly different size.
• Pressing 4-1/4 or 6” Dal tile without the thermal mat piece in the center- you can overcome pressing without a thermal mat in the center by simply adding 45 more seconds to your pressing time.
• If you are designing a full bleed image your printed area should be at least 2/10” larger than the tile. If your tile is 6x6”, your printed transfer should be 6.2”x6.2”, etc. If your image is not a full bleed, print registration marks slightly larger than the size of the tile.
• The tile should be centered under the main pressure point of your heat press platen.
• When pressing multiple tiles at once, we recommend leaving at least 1” space between each tile. You should also add an additional 30 seconds to your dwell time for multiple tiles.
• When gluing these tiles into wood or metal frames we recommend 100% silicone aquarium sealant.
• Tile Sheets: The plastic mesh on the back of tile sheets is designed for the construction industry, not the dye-sub industry. It may melt on the heat press. If you wish to leave the sheet intact, we recommend: 1) press through the front of the sheet using our thermal rubber mat over the transfer paper, and 2) allow the sheet to cool completely before removing it from the press bed. Use a Teflon sheet over the tile.
Customer Support
For support on these or any of our products, please call our toll-free number for assistance: 877.795.1500. You may also write to us at Support@LaserReproductions.com.
Time/Temperature Chart
Ceramic Tiles
Note: Following are estimates only; actual times may vary!
Tile Size Ceramic tiles
2 x 2” 4 min Press up using thermal mat
3” x 6” 5 min
4” x 4” 6 min Use thermal rubber squares
6” x 6”
6 x 8” 6.5 min
8” x 8” 8 min
12” x 12” 9 min
Tip: when pressing full bleed images, we find it best to cut out each transfer into singles so as the tile will press fully along the edges of the tile. This is a critical problem/solution. Thank you.